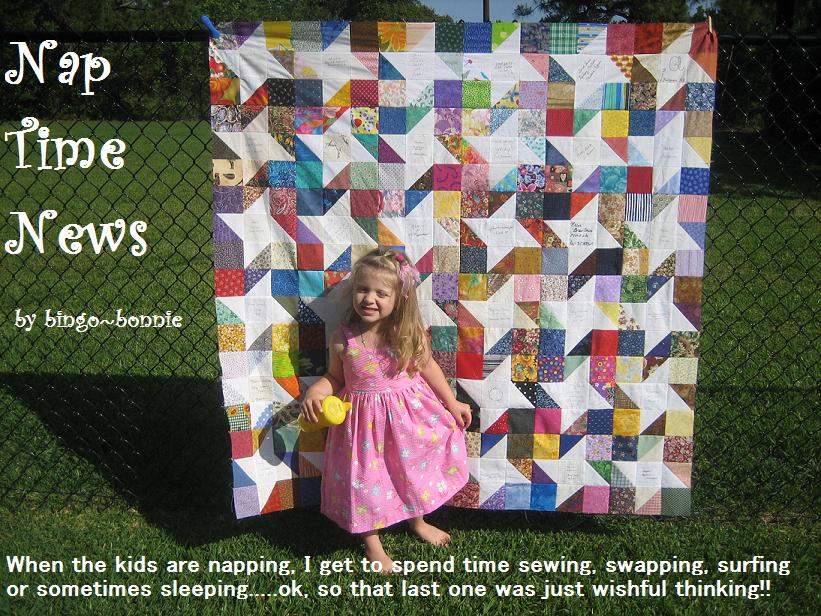
I've never made a tutorial post before so please bear with me. Also for my mini 9 patch swappers, please accept my apology for posting this soooooooooooo long after I promised I would.... uham, months ago... but better late than never right? ;)
Please feel FREE to cut and paste into a word document and edit as you see fit to save for future reference :)
 The first time I tried making a mini 9 patch using he strip method, I was shocked after all the hard work and time spent pinning to get perfect seam matches... only to find that my block did NOT measure 3.5" I don't remember the exact measurement but it was a LOT off! Not usable at all - and sadly it wasn't just one block but about a dozen unusable blocks.
So I got to thinking - there has to be a way to cheat - or rather make a tad bit larger then trim down to the perfect 3.5" measurement! :) Here is what I came up with:
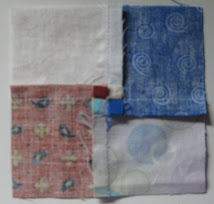
First off, I usef different sized strips of white and different size strips of color. The fat strip on the left is cut at 2" - and the skinny strip on the right is cut 1.5"
 Now, I join them fat, skinny in the middle, and fat again according to colors.
 Above photo you see the skinny 1.5" color strip in the middle that will be our center row for our mini 9 patch.
Below in the photo you see a skinny 1.5" white in the middle - these cuts will the be the top and bottom rows of our 9 patch.  Also I learned that when sewing the strips into rows like the ones above - it paid off to sew slow and steady - do not put the pedal to the metal or you may end up with little tucks along the way. OH, also I pin about ever 4 inches or so. Sorry forgot to take photos during those steps.
  See my long rows... These are from cuts from selvage to selvage. From these you will have enough to make 11 mini 9 patches... (we're swapping sets of 10) and some extra left over from the strip set on the left to use if you want to make more for yourself....you'll need to make another color,white,color set to go with them...
Now, It's time to cut off some sections. Rows for the 9patch. We'll start with the strip set on the right and cut them into 2" segments. These will be the top and bottom rows of the 9patch aka row 1 and row 3.
 Next, I warm the seam or also known as setting the seam... then open it up and press to the left - this will make the seam go away from the center square.


Also I learned that when sewing the strips into rows like the ones above - it paid off to sew slow and steady - do not put the pedal to the metal or you may end up with little tucks along the way. OH, also I pin about ever 4 inches or so. Sorry forgot to take photos during those steps. See my long rows... These are from cuts from selvage to selvage. From these you will have enough to make 11 mini 9 patches... (we're swapping sets of 10) and some extra left over from the strip set on the left to use if you want to make more for yourself....you'll need to make another color,white,color set to go with them... Now, It's time to cut off some sections. Rows for the 9patch. We'll start with the strip set on the right and cut them into 2" segments. These will be the top and bottom rows of the 9patch aka row 1 and row 3.
First I start off by getting a clean cut from the strip sets.... Then cut segments 2" wide each all the way down the row...
  TaDa! To make a set of 10 minis for the swap, you need a total of 20 of these.. or more if you are making extras to keep.
 and b/c yesterday when I started this post I cut the other set at 2" MISTAKE... I think I can use them anyway and trim them the white, color, white set to the 1.5" size that they should be.... so here goes. See my ruler is set to the 1.5" mark...
 slice! You can avoid all this extra work if you just take your white, color, white strip set and just cut 1.5" segments. These are the center rows of your 9 patch and you will have enough fabric to cut 10 segments for the swap and a lot left over for more for yourself... all you need to complete them is to make more of the opposite sets to go with them.
  OK, here are rows 1, 2 and 3 ready to be sewn together. The important tip here is to USE PINS at the seams to get them to match perfectly!!! ;) It doesn't take as long as you may think ;) and you'll be glad you did!
  I place the skinny 1.5" row face down on the top when I sew them...
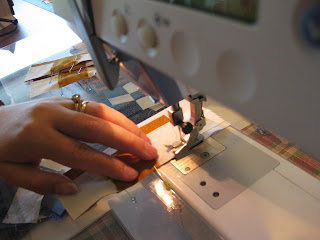 Also, I either leave in the machine the last set or if I want to cut it off to press it now, I use a scrap runner (the blue/pink small scrap) to sew up on and stop with my needle down. Or if you have read about Bonnie Hunter's leader/ender project, you can do that too! ;)
Then cut segments 2" wide each all the way down the row... TaDa! To make a set of 10 minis for the swap, you need a total of 20 of these.. or more if you are making extras to keep. and b/c yesterday when I started this post I cut the other set at 2" MISTAKE... I think I can use them anyway and trim them the white, color, white set to the 1.5" size that they should be.... so here goes. See my ruler is set to the 1.5" mark...slice! You can avoid all this extra work if you just take your white, color, white strip set and just cut 1.5" segments. These are the center rows of your 9 patch and you will have enough fabric to cut 10 segments for the swap and a lot left over for more for yourself... all you need to complete them is to make more of the opposite sets to go with them. OK, here are rows 1, 2 and 3 ready to be sewn together. The important tip here is to USE PINS at the seams to get them to match perfectly!!! ;) It doesn't take as long as you may think ;) and you'll be glad you did! I place the skinny 1.5" row face down on the top when I sew them...Also, I either leave in the machine the last set or if I want to cut it off to press it now, I use a scrap runner (the blue/pink small scrap) to sew up on and stop with my needle down. Or if you have read about Bonnie Hunter's leader/ender project, you can do that too! ;)
OK, here's the two that I just sewed together... ready to press. First I flip them over so that the fatter sections are on top - this will allow the seams to be pressed outward (away from the center square) like I like :)
Next, I warm the seam or also known as setting the seam... then open it up and press to the left - this will make the seam go away from the center square.


Now ready to grab two segments of the color, white, color and grab the pins again and attach the 3rd row to these babies...
There, got them pined... ready to sew and press. ....remember pinning makes them perfect! ;) While I am finishing up Nora is "cleaning up her buttons" across the table from me. ;)
 ready to press open .....Yes, all three rows are together - you can't see them all from the photo but that center skinny row is under there. Trust me :)
While I am finishing up Nora is "cleaning up her buttons" across the table from me. ;) ready to press open .....Yes, all three rows are together - you can't see them all from the photo but that center skinny row is under there. Trust me :)
TaDa again! they're sewn and ready for trimming... but that will be part 2 to be posted tomorrow.
 I hope you were able to follow along and understand about where to place 1.5" strips and where to have 2" strips. Once you get the hang of that - everything else is easy! :)
I hope you were able to follow along and understand about where to place 1.5" strips and where to have 2" strips. Once you get the hang of that - everything else is easy! :)
I promise tomorrow's trimming post will not be as long. :)
Edited to add the link to Part 2: Mini 9 Patch Squared UP
Until then.... Love from Texas! ~bonnie
Edited to add the link to Part 2: Mini 9 Patch Squared UP
Until then.... Love from Texas! ~bonnie


 She has also include several links on her blog to those playing along and it is fun to "go for a visit" to other blogs and see what they're using in their sewing rooms to contain their notions!
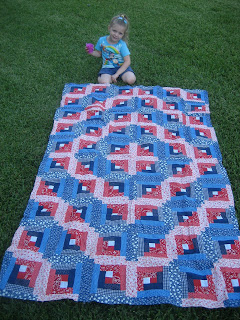


