- Click Here to take you to Binding Tutorial PART 1
- Click Here to take you to Binding Tutorial PART 2
When I left you last we had just changed presser feet, putting on our "Mr. Git'er DONE" Walking Foot. This really is a must have foot - especially for attaching binding!! I'm so glad I insisted that we buy it at the same time as my machine when we got the 6 months zero interest... as the Bernina walking foot is over $100!! Ouch! but really a foot you just gotta have!
In the past I've had some of my readers comment and tell me that they are like me and use pins - while others have said they never use them at all for their binding.
Below I'm just going to share with you what works for me and how I do it. Everyone has their own way and I've learned a lot reading others blogs and just hope that maybe sharing with you will help someone else out.
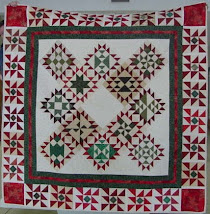
So that being said, I've already sewn together my starter and stopper and I know it fits this quilt... I'm gonna stick to what I know works for me and pin my binding onto my quilt first.

at first when I sat down I couldn't remember where I usually place my binding under the foot - if it's to the left or do I line it up to the right???... didn't take me but a few inches to see I was off just a hair and not enough seam to fill the binding after folded over.

That is the great part of keeping a blog - now if I'm ever in doubt I can come back and look it up and see form the above photo that - this is how I need to line up my binding under my walking foot!
*Note To Self* = NEEDLE to the farthest RIGHT position & fabric lined up with right side of foot. Needle down & GO! ;)
Thankfully I had only sewn about 12-15" or so and found out and could restart again. I like my bindings to be completely filled up with quilt in them. ;)

OK, so the rest of this step is pretty simple. You'll remember that I have all of mine pinned onto the quilt... which means - that when you approach a corner you MUST remove a couple pins and unfold some of the fabric.... You do not want to sew over your folded mitered corners like this. :P ask me how I know. LOL but I only made that error once!
It's nothing hard - Just remove the corner pin and the first 1 or 2 after the corner so you can bring down the binding past the quilt's edge.

NOTICE the diagonal crease, I finger pressed earlier when pinning, in my blue binding? That is what I'll be looking at as I sew into this corner. I'll go slow and STOP WHEN my NEEDLE LANDS in the CREASE. - stop with needle down.

Then raise presser foot and pivot the quilt so that you are now going to sew directly in that crease - diagonally off of the quilt.

if you had a pin there - remove it before sewing ;) and below you will notice that when I cut my thread and pick it up - it almost is read to fold its self back b/c of my fingered pressed mitered corner. ;)

I use my thumb to hold it down and snip that thread there...

then I put it back down under the needle about 1/4" into the quilt b/c I like to back stitch off of the quilt when I begin and then forward...

and there you go - repeat all the way around the quilt... ;)

and here I am - back to where I got started! :) and no one is going to be able to tell where my binding start and stop was b/c I connected those two loose ends before I began!

Now that you have your binding attached to the front of your quilt - it's time to grab your pins!! Mine are the 1.75" long, glass head pins made by Clover. I love them!

I know you know how to pin... but here are a few tips I've found useful. After all, you don't want to go to all that work and then get done to find that while sewing you didn't catch the binding in your stitch!

I fold over the binding to the back side just slightly below my stitching that was made while sewing the binding onto the front.
I pin from the table side (front of the quilt) up and then stick the pin down just before that edge of binding. Hope this photo show it like I'm talking about.

It's impotrant that when you are sticking the pin the 2nd time that you don't go beyond the binding into the quilt - if so then the pin is not doing it's job holding that binding just where you want it.

another tip - pin close so there are no gaps.. I place one pin then the 2nd about a hand with apart and form there place my 3rd in the middle of those first two and then I pin in the middle of those spots again.

That's how I work my way down each side of the quilt.

When I come to a corner - it's rather easy b/c I sewed my mitered fold as I was attaching the binding to the quilt. I stop about here and the press it down like this. Then place pins up to that fold.

then the right side I simply fold it over and look - a perfect miter! Aaah - seeing that pretty corner almost makes me totally forget about the week long frog stitching I did with that disastrous free motion Life Saver ring design I tried. :P

Looks good doesn't it. I have to tell you my corners didn't always look this neat - I've made some UGLY corners over the years before I started pinning my corners before sewing onto the top.

while those above would work OK, I still add one more diagonal pin - just to hold it down good. I don't want to chance this pretty thing coming loose! ;)

and here is what it looks like on the front... and YES, I do sew over all of my pins - with my walking foot on, it just simply goes right over with no hesitation at all and of course I'm going slow.

Above photo - the pin with sharp point up - to far right closest to corner - my finger is on the blue glass head - yeah, that one ;) I like to go ahead and poke that sharp point thru to the back side so that my walking foot doesn't catch on it.
Lastly it's time to stitch in the ditch on the front side - and rather than bore you to death with more photos... I will share with you JudyL's video - this is what I watched to learn how and she does a wonderful job 'splaining things ;) I love hearing her talk don't you!?
Thanks to all of you who've read along as I shared "what works for me" binding tutorial and tips... I hope that this will help you to finish up some of your quilts! I have to confess, I once left a binding that I paid Bonnie Hunter to sew on after quilting my quilt UNFINISHED for over a year b/c I just didn't feel I had time to sit and hand stitch... and didn't know about machine finishing.
I'm so glad that I do now - and for me this will be the only way I finish my quilts! After all they are machine pieced & machine quilted - why not machine finish too? ;)


You just never know when you are going to get a new tip that you just never thought of before. I always left the needle in the middle and used that little mark on the Bernina walking foot as the 1/4 inch mark. But it has a habit of getting wonky when I do it that way. Thanks for the tip, I'm going to use the right needle position and see how that works out for me.
ReplyDeleteGreat info, i glad to see this blog, such an informative article, Thanks for share this.
ReplyDeleteCollege Research Papers